– Build A $300 Underground Greenhouse “Walipini” That Grows Food Year Round:
DIY plans, videos, infographic, and info about the Walipini, an underground greenhouse that lets you grow year round. You can build it for less than $300!!
Homesteaders, farmers, and backyard gardeners often use various methods to extend the growing season, especially in colder climates.
They often use cold frames, hoop houses, black plastic, frost covers, and greenhouses to give their crops a boost or a head start for the coming growing season. They’re also used to hold off the fall frost for a few more days or sometimes weeks.
Greenhouses are the largest and most permanent of these structures. They are usually expensive to construct and require a lot of additional heat to extend the season much into the winter.
The Walipini…Walawhat?
A much more affordable and effective alternative to a standard greenhouse is the walipini. This strange word comes from an Aymara Indian word for the “place of warmth”. They are also known as an underground greenhouse or a pit greenhouse.
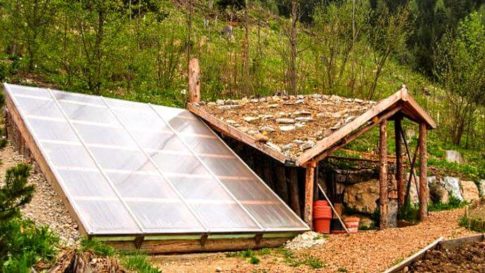
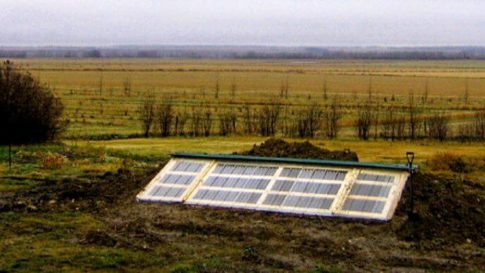
A walipini, is an underground greenhouse with a transparent (usually plastic, but you can use glass or even recycled windows) covering that stays warm by passively soaking up the sun’s heat and absorbing the earth’s thermal energy.
These underground greenhouse were first created over 20 years ago for the cold mountainous regions of South America to maintain food production year round even in the coldest of climates, but walipini’s are now being adopted by homesteaders and gardeners alike.
Make Your Own Walipini
If you want to build your own underground greenhouse, or walipini, then get these must-read books on the subject to learn exactly how.
The classic standard on the subject –
The Earth Sheltered Solar Greenhouse BookThe new standard on underground greenhouses –
The Year-Round Solar Greenhouse: How to Design and Build a Net-Zero Energy GreenhouseImportant notes and tips for building anything underground –
The Fifty Dollar and Up Underground House Book
Walipinis are versatile structures that can grow some tomatoes and salad crops in your back yard year round, or bananas at 14,000 feet in the Andes of South and Central America. Fruits and vegetables can be grown year-round, making it ideal for colder locations.
$300 Walipini Design
The walipini technique has been used by many organizations worldwide. The Benson Institute, a worldwide food security program and its team of volunteers built a massive 74-feet-by-20-feet walipini in La Paz, Bolivia to feed an entire community. The total cost? Around $300. They published a now hard to find DIY manual on how to build one yourself.
It explains:
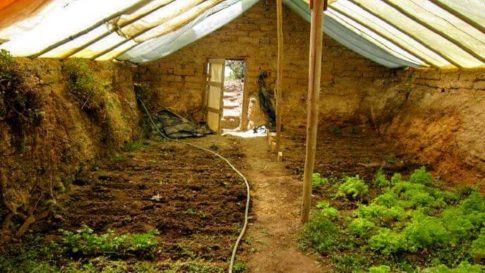
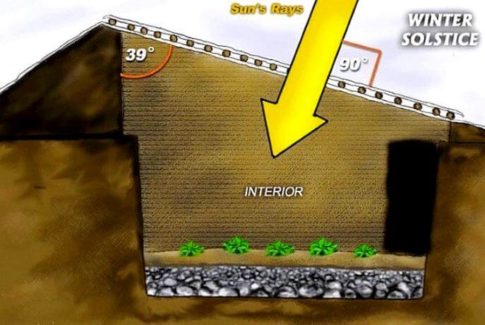
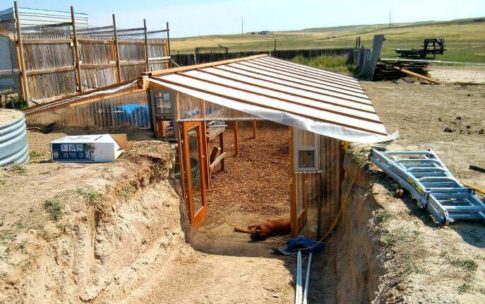
The Walipini, in simplest terms, is a rectangular hole in the ground 6 to 8 feet deep covered by plastic sheeting. The longest area of the rectangle faces the winter sun—to the north in the Southern Hemisphere and to the south in the Northern Hemisphere. A thick wall of rammed earth at the back of the building and a much lower wall at the front provide the needed angle for the plastic sheet roof. This roof seals the hole, provides an insulating airspace between the two layers of plastic (a sheet on the top and another on the bottom of the roof/poles) and allows the suns rays to penetrate creating a warm, stable environment for plant growth.
Minneapolis-based Seasons Unity Project also builds walipini’s in places with surface temperatures as cold as -10 degrees Fahrenheit as few as four feet below ground level.
Of course, many climates are too harsh for growing healthy vegetables, fruits, and herbs outside year-round. Rather than stopping at the apparent challenge or obstacle… [walipini’s] allows its caretaker to harvest, store, and deliver energy without generation or requirement of external energy or active energy input.
Walipini Videos
This 4-minute video features a farmer from the Comanche community in Bolivia as he explains how a walipini helps grow crops for his community even during the harsh winter.
It’s a new system for us. We can rescue the heat, and with that heat we can make a good production and we also save water. With a walipini…we can produce not only fodder (for animals), we can produce food for all the people who live here.
This video covers the basics of what a walipini is, how to build one, and you can see the general walipini design idea. This is a great beginner walipini video to watch first and serves as a nice primer for the more technical ones below.
Here is this video from February of 2017 we can see a walipini in action, full of seed flats for this years crop.
But how well do walipini’s really work? What about two years from now? How about five years from now?
Here in this video you can see a walipini in year two of production.
https://youtu.be/HBCoXg4rvbc
and here we have a walipini after four years of production, with several modifications over time that have greatly improved it’s heat storage ability.
And finally here is yet another walipini, this one after a solid five years of constant use.
For those looking for a more technical analysis from a scientific point of view, check out this video full of data analysis and thermodynamic figures.
As you can see from these videos the walipini is a popular design that follows a simple blueprint. You can get vastly technical with it, like in the last video, or extremely simple and just dig a hole, but in essence you’re goal is to trap the heat underground for a year round crop season.
A walipini isn’t just for mountainous regions either, it’s also great for places more resembling your back yard, like the very flat and moderate climate of The Netherlands. The Creative Garden Wageningen project is working on a walipini they’ve appropriately named the Sunken Greenhouse.
Amazingly, the structure’s inside beam is a living willow tree! The roof covering was made with donated landfill plastic. They plan to grow such hot weather crops such as lemons, strawberries, peppers, and a variety of beans and herbs year round.
Wait…It’s A Greenhouse…Underground?
Yep. It sure is. But why build a greenhouse, a shelter who’s primary use is to trap the sun, underground?
First off, walipini’s and underground greenhouses in general are not fully built under the ground as the name might imply, but instead are constructed like a lean-to on a dug out area or build above an open pit where the actual gardening takes place.
Typically walipini’s uses a wall of compressed earth on one side of the building and a shorter wall on the other side. This makes an angle for a plastic sheet roof that catches the sun’s rays to create the ideal temperature for plant growth.
Ok, so why go through the trouble of putting a greenhouse partly in the ground or over a dug out pit, you ask? Simple thermodynamics thanks to the insulation properties of all that dirt, that’s why. By digging just six to eight feet below the earth, growers can take advantage of the Earth’s thermal constant.
The temperature a foot below the surface is fairly constant and with the added heat coming from the sun it makes a nice place to grow crops. Walipini’s can reach 120F inside when the outside temps are in the 20’s. But if you are in an especially cold climate you may have to add some additional heat storage so the heat will last through the night, such as covering the inside of your walipini with stone, black drums full of water, bags of lava rocks, or any dense material able to store heat.
A lot of heat energy is required to change the temperature of high density materials like water, concrete, and bricks so they act like a solar battery, storing heat during the day and releasing that heat at night to keep the crops warm.
For these reasons, typically walipini’s are at least 8’ by 12’ in size to maintain a usable amount of heat, but most are built much larger. The bigger the better when it comes to heat storage.
Other Benefits Of A Walipini Underground Greenhouse
Another benefit of a walipini is the minimal upkeep. Since they are mostly underground, only an angled roof is exposed to the elements. This makes it much easier to maintain and it’s cheaper to replace all the plastic in a few years.
While the cost of digging a pit for an underground greenhouse can be high if you have to hire someone or rent heavy machinery, since the actual structure of these underground greenhouses can be built using cut trees and saplings the costs can be kept to a minimum. If you have a tractor or backhoe, or alternatively a lot of people to help and/or soft ground, your only costs may be a box of screws and greenhouse plastic.
Planning Your Walipini Pit Greenhouse
The beauty of the walipini is its simple but effective design that can be built by anyone with a small budget and a few free weekends.
Make Your Own Walipini
If you want to build your own underground greenhouse, or walipini, then get these must-read books on the subject to learn exactly how.
The classic standard on the subject –
The Earth Sheltered Solar Greenhouse BookThe new standard on underground greenhouses –
The Year-Round Solar Greenhouse: How to Design and Build a Net-Zero Energy GreenhouseImportant notes and tips for building anything underground –
The Fifty Dollar and Up Underground House Book
Although walipini’s require minimal effort to maintain, it is important to be thorough with your initial planning and design or they will completely fail. Properly waterproofing, draining and ventilating an underground greenhouse is extremely important and a huge topic itself far too large to detail in this post.
Also, you have to build a wailpini at least five to eight feet above the water table otherwise it will flood. Generally speaking, Walipini’s should be build on high ground and you will need to provide excellent drainage around the perimeter to keep water out. You can’t build a pit in a low lying area and expect it to stay dry, so pick a spot on high ground or expect a constant battle with flooding.
Since cold air sinks downwards, your design should include an entrance that is slightly deeper underground than the grow floor if possible to prevent warm air from exiting the structure.
Like any greenhouse, your walipini should stretch longer to the east and west and be shorter on the north and south side to maximize solar exposure.
Gutters can even be incorporated on the roof to harvest rainwater too.
Take notes from Earth Ships and underground homes that line the walls with rubber tires or black barrels to create additional insulation and heat entrapment. Incorporate ventilation vents and use the wind as a natural cooling system or your walipini will not be able to cool off on hot summer days.
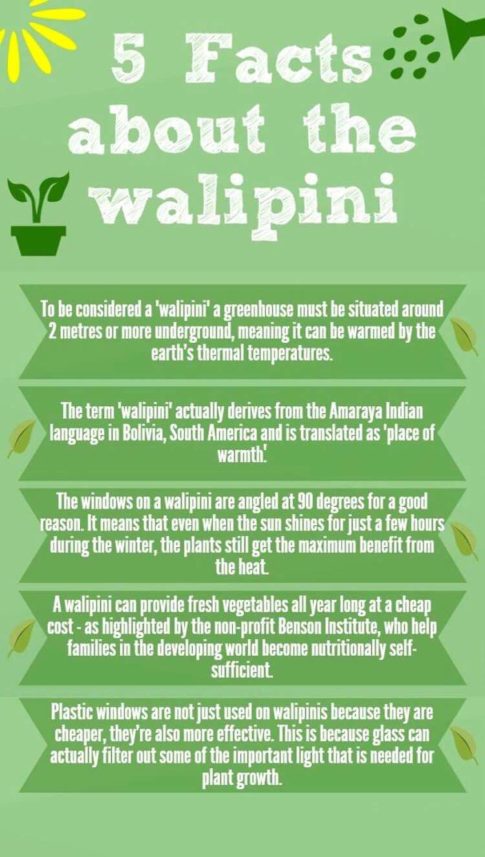
Walipini Infographic
If you’re interested in building your own underground greenhouse, check out this infographic with 5 things you should know:
Click To Enlarge
Final Thoughts
Walipini’s are simple to design and build (assuming you have access to a tractor or backhoe), and as long as you keep water drainage in mind there should be nothing stopping you from growing herbs, luscious greens, fruits, and veggies year round!
* * *
PayPal: Donate in USD
PayPal: Donate in EUR
PayPal: Donate in GBP
